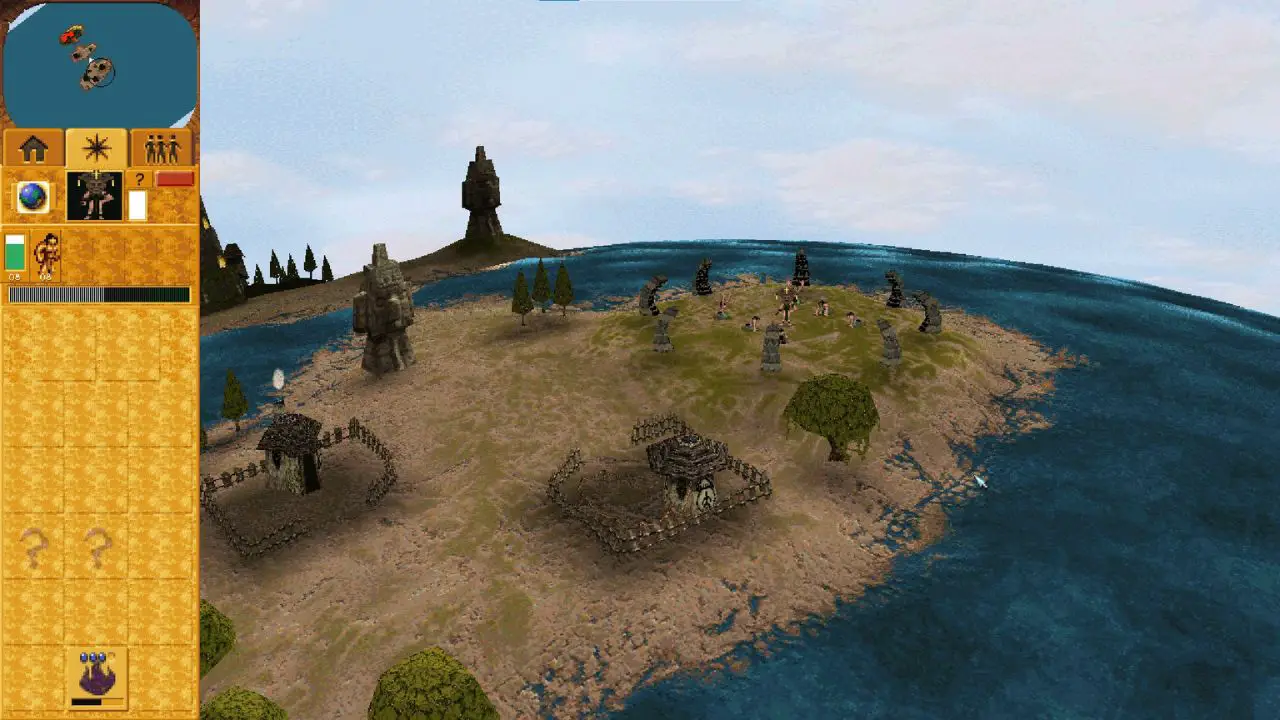
Populous: The Beginning, while being one of the greatest RTS game of all time, is also a pretty old one from 1998. And that certainly means compatibility problems with modern hardware and software.
Whether you are having trouble starting the game, encountering crashes, the game not running smoothly or with low frame rate, not being able to select a proper high resolution; or looking for more Populous: The Beginning content like more Single Player campaigns, or cooperative play with a friend, and even if you want to take it to the next level looking for Multiplayer matches or creating new levels and maps yourself. This guide has you covered.
Resolutions
Once you’ve installed the 1.5 version you can choose from a wide range of resolution options and with a way more convenient interface to do so. While in-game, just go to Options > Graphics > Screen resolution and Scaling.
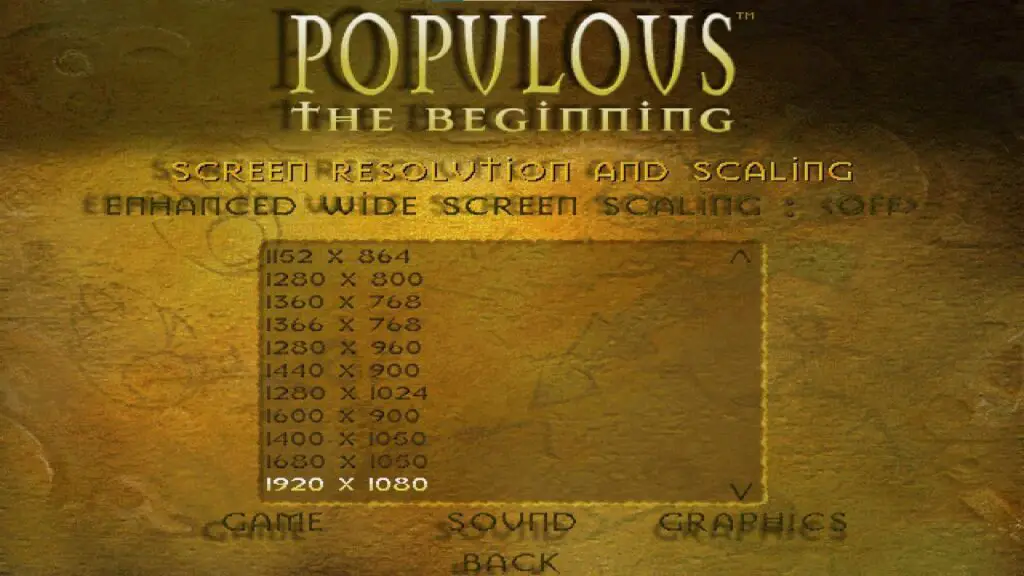
You can also run the vanilla version of the game with all resolutions included, by adding the /allres flag.
NOTE: Populous: The Beginning natively ran in 640×480 and 800×600. Running beyond 1920×1080 might create visual artifacts, or be more prone to crashing.
Recover lost progress — Direct Level Selection
Being a 1998 game means no auto-saving, and you could find yourself being deep in a Populous: The Beginning session going through several levels. You leave it and just quit the game altogether.
Sooner than later, you find out that you didn’t save your game while you’ve been unlocking new worlds and have to go back and do it all again in order to recover your lost progress.
Worry not! As we have a solution so you can recover (kinda) your lost progress!
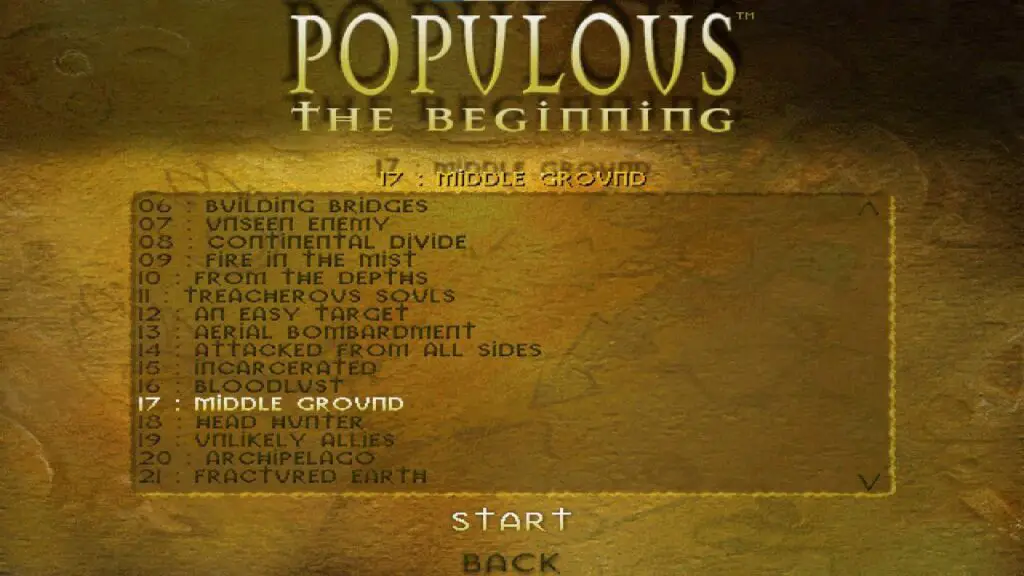
Fortunately, with the 1.5 version (visit the proper section on how to get it if you haven’t) comes a new level selector. So just like in the official expansion Undiscovered Worlds, you can select any of the 25 original campaign levels.
Now you can go and restart your game from where you’ve left or go right into any favorite mission of yours.
While in-game just go to the Single Level section and there you’ll find all 25 levels. Select the one you’d like to play, and hit Start.
Remapping Hotkeys Bindings
Setting hotkeys in 1.5
Populous: The Beginning has quite some actions we can do and take while playing. And being a Real Time Strategy game, key mappings could be a must. Unfortunately, the original version of this game didn’t allow us to rebind hotkeys, and most of the actions didn’t even have keys assigned to them.
Fortunately, with 1.5 version we can! (visit the 1.5 version section on how to install it if you haven’t already). This means, we can place down the buildings or cast spells with the click of a key.
We can set hotkeys for all spells and buildings plans, as well as for other actions like selecting/deselecting units, etc., without pointing and clicking everything.
If you want to set your keys in 1.5 you can do so in-game by going to Options > Key mappings. Here you’ll encounter all the possible actions we can assign keys to. So modify them to your likings.
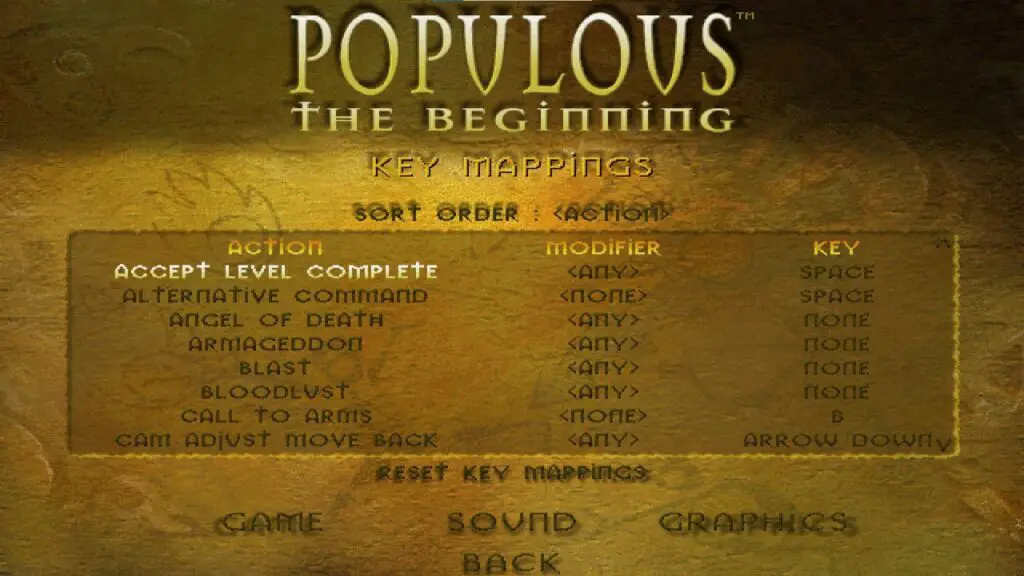
These are some quirks you must know when configuring the key bindings:
- The spell Swarm is called “Insect Plague”
- The spell Tornado is called “Whirlwind”
- World View is called “Toggle view”
- You can assign the same key for multiple actions, this could generate some conflicts, like one of said actions not working when pressing the key.
- If you assign different actions to the same key, watch for it to have different modifiers. E.g.: I assigned Q, so the spell blast is selected. I’ve also assigned Q to select the Hut plan, but this one I made have the Ctrl modifier, this way I need to press CTRL+Q when I want to place down a hut, while hitting just Q will select my Blast spell.
- You can sort by Action (the name of the action or spell), Keys and Modifiers (Alt, Ctrl, Shift) so it’s easier to find what you’re looking for.
- If some of the keys are not working, sort by Keys and check it isn’t assigned to another thing. Even if some of them are properly assigned (like my Q for Blast and Hut plans) verify that the one that doesn’t use modifiers has selected NONE under the modifier section, and not ANY, as this could override all the modifiers the key is using (in my previous example, having ANY set to Q instead of NONE would prevent me from using Hut plans with the Shift modifier)
Setting hotkeys in Multiverse
For Multiverse (see next section), it’s mostly the same as to setting hotkeys, the names of the actions and the quirks of it. There are a couple of main differences here, however.
The first one is that to set your hotkeys in Populous Multiverse you must do so from this little console that you’ll find whenever you open the game in Multiverse:
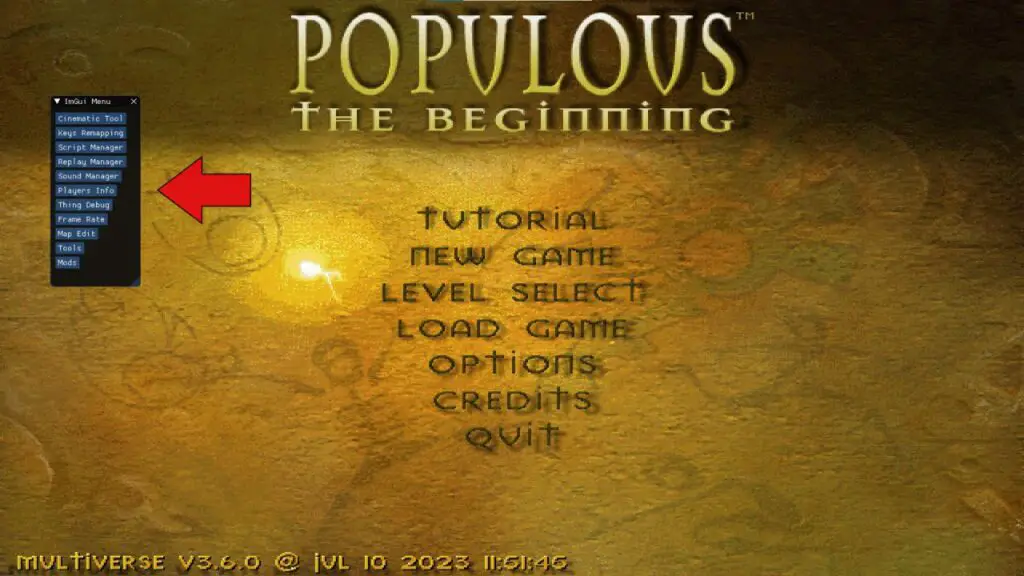
If you happen to close the console, you can open it again by pressing Shift+F1.
Here you must select the conveniently named “Keys remapping” button, and it will open the following window where you can see all the actions, modifiers, and keys available to do your proper key remapping.

The quirks you must know about this are:
- Here you have a search bar if you desire to look directly for a specific action.
- In the Extra tab you will find all the spells and some other actions.
- It’s important that you save your keys once you’ve finished setting them up by hitting the Save Hotkeys button. Both in the Hotkeys and the Extra tabs.
- Whenever you come back to play, open the same menu, and hit Load Hotkeys button in order to load the last settings you’ve saved.
Multiverse
Populous Multiverse is a community made version that enhances the original Populous: The Beginning and adds content to it. It’s close to the original version of the game but with fixes and quality of life enhancements like more game stability, better frame rate, hotkey remapping, etc.
With Populous Multiverse you will also be able to have a lot of different campaigns (EXTRA campaigns!), from the original campaign and its only official expansion Undiscovered Worlds, all the way up to this very day. All these campaigns that were made by the Populous community.
You will also be able to enjoy extra stuff via mods.
You will be able to enjoy and manage all your extra campaigns, options, and mods via the Multiverse Launcher.
Follow the steps to get the Multiverse Launcher
- I will take for granted you already acquired Populous: The Beginning in Steam and installed it.
- You can get the Multiverse Launcher by going to The Beginning site.
- Go to the Multiverse section and scroll down a little until you see “Click here to download the Multiverse Launcher”.
- Install it in your Populous: The Beginning Steam installation folder. The directory should look something like this:
C:\Program Files (x86)\Steam\steamapps\common\Populous 3\
(Obviously, this could vary depending on your Steam disk drive and installation folder).
Congratulations, you now have the Multiverse Launcher!
Download More campaigns
The awesome Populous community has been making more campaigns throughout the years (the last one released in 2023!) and they have a wide range of difficulties.
So either if you’re the most of the newbies or want to relax with some extra content, as well as if you’re a seasoned player or just looking for a challenge, you’ll find something for you.
How to get more Populous: The Beginning campaigns:
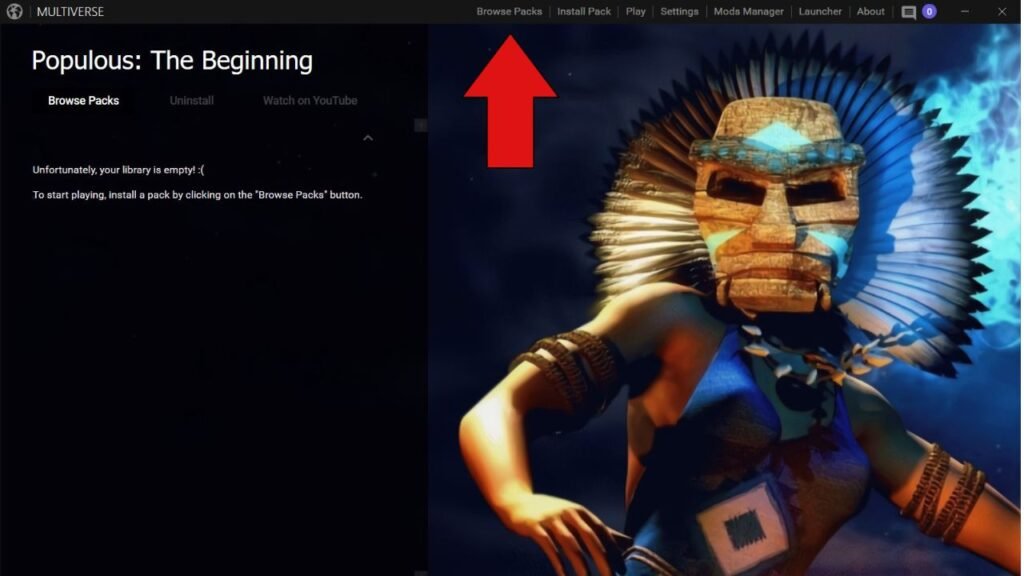
- Once you’ve installed the Multiverse Launcher and in order to prevent some problems, run the application as Administrator.
- Click on “Browse packs” button.
- This will open your browser and take you to https://thebeginning.uk/campaigns/
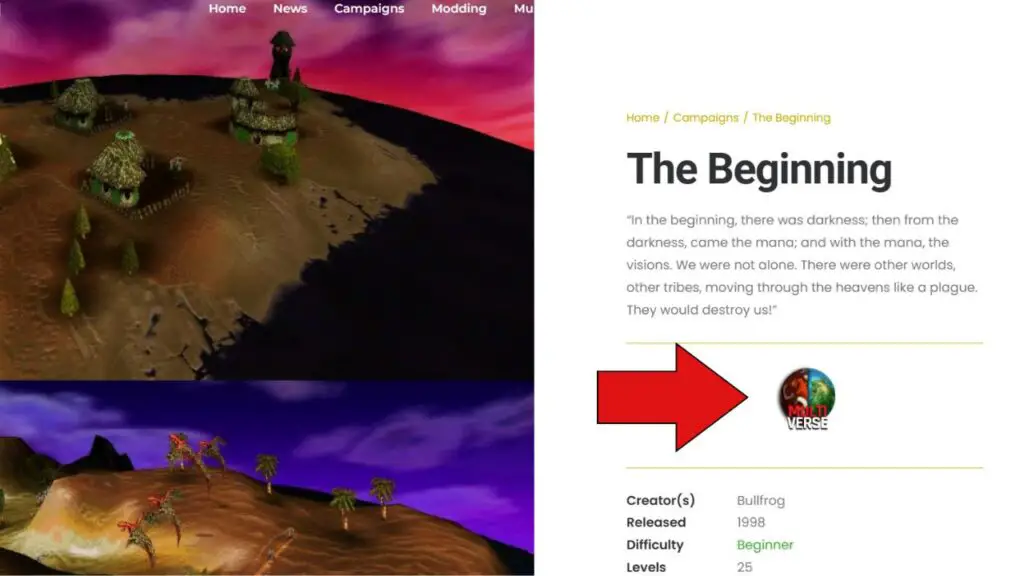
- Here you can find all the available Populous: The Beginning campaigns, with a brief description of each.
- Click on any campaign that you want to install. This will take you to the specific campaign page. Now you must click the Multiverse icon.
- It will prompt your browser with a pop-up asking if you allow this page to open the Multiverse Launcher. Once you accept, it will automatically download and install the campaign.
NOTE: If it says that you need Admin rights in order to be able to install the campaigns, go to the installation folder, right click MultiverseLauncher.exe, go to properties and under the compatibility tab check the Run as administrator box. So every time the program opens, it does with Admin rights.
Once you’ve installed your first campaign! And now your Multiverse Launcher should look something like this:
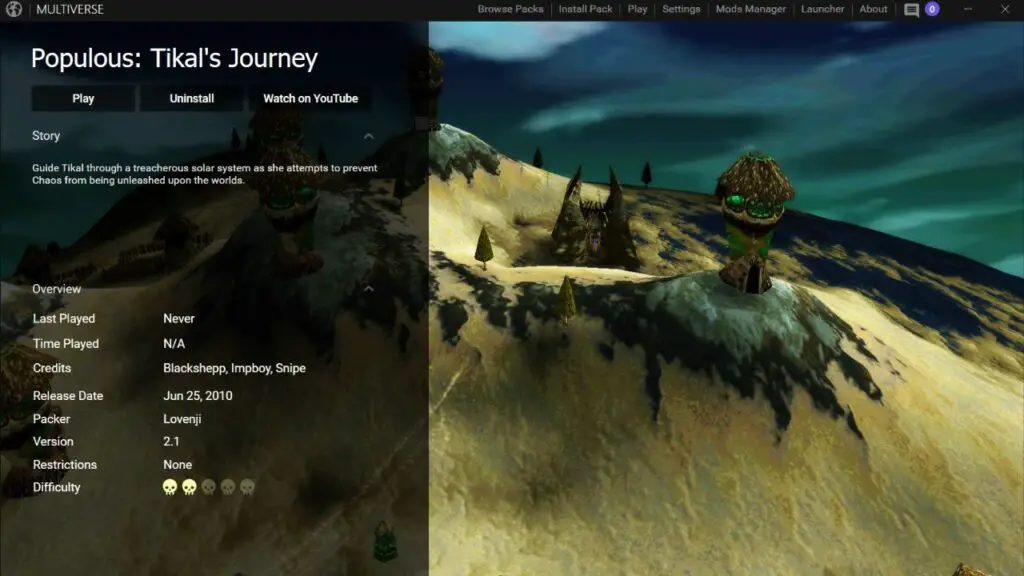
There you can see some info about the campaign like the story synopsis, release date and difficulty. If you’re ready to play the campaign, just hit the Play button.
Co-op Campaign
If you have a friend or any partner to play with and want to unleash cataclysmic spells while conquering worlds cooperatively, this is the way, look no further, I present to you The War of the Gods campaign: a two player co-op campaign that consists of 25 levels that pay homage to the original campaign in some ways.
How to play co-op campaign War of the Gods in Populous: The Beginning
Since this is multiplayer, you’re going to need to have Populous Matchmaker installed
You and your friend should hop into the Populous Matchmaker. One of the two should be able to host. To see if you can host go to Options > Network > Click Port Test button.
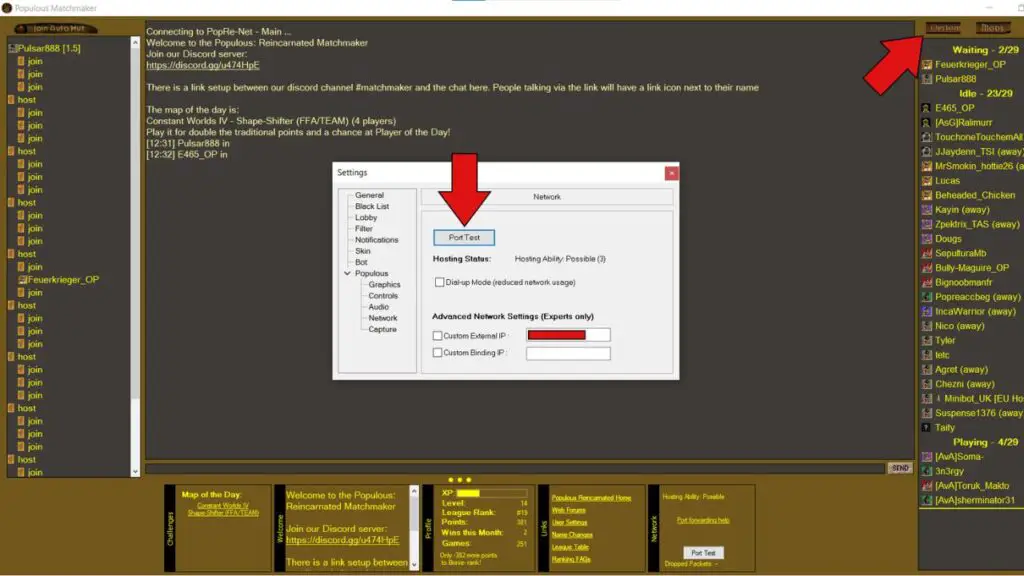
It will give a result from 1 to 5. With 5 being really unlikely that you could host and 1 being possible to host. You should get at least a 3.
In order to be able to host, you need to set your computer IP to static. Then go to your router setup page and forward port 7575 UDP to your IP.
Once any of you is able to host you need to jump in one of the “huts” that you see on your left side. The one being able to host should take the “host” spot, and the other the spot immediately below it, which is called “join”.
The host is the player that sets the game up and its configuration. Once you join the host seat, you’ll see some hosting options. The most important bits here are that you select the correct version of the game and the correct map.

This campaign is called War of the Gods and thus you can find the mappack by the same name. The campaign is divided into two mappacks: War of the Gods and War of the Gods (part 2).
And the levels are the same as they’re arranged in the mappacks:
Levels:
- Erecting Paths
- Hornet Nest
- Cursed Faith
- Triforce of Storms
- Black Death
- Supernatural Voodoo
- Inconspicuous Odds
- Intercontinental Split
- Obscured From the Flow (Fog of War on)
- A Sinking Feeling
- Perilous Spirits
- A Pushover Decision
- Ethereal Onslaught
- Ambush Assault
- Detained
- Bloodthirsty
— War of the Gods (Part 2) — - Center Field
- Top Stalker (Fog of War on)
- Absurd Partners
- Demon’s Flight
- Ruptured World
- Stranded
- Hellfire
- A Mortal’s End
- War Of The Gods
Once you selected the level you want to play, hit the launch button that’s next to the version selection. You and your friend will be taken into the Populous: The Beginning pre-game lobby.
Here is very important that you set Computer Players: Yes. Otherwise there won’t be AI in the game and the level will finish right when you start it.
Also turn Fog of War: On in levels 9 (Obscured From the Flow) and 18 (Top Stalker).
Once you’re ready just hit start.
And that’s it! You should now be playing with your friend (Blue and Red tribes) together against the other 6 tribes!
NOTE: Forgot to mention. Last level of the campaign (25, War of the Gods) makes use of Omnipresent shaman. The Populous Matchmaker anti-cheat system will kick you out of the game and call you a cheater. To prevent this, before launching the game just type !cheat in the Matchmaker chat and press enter. You will now be able to play the level.
This guide will keep being updated and will keep getting new stuff as long as I am able to. There’s a lot to cover from this awesome game, and despite this guide being quite big, I haven’t covered it all. I also don’t have all the answers and solutions.
But if you find yourself with any problem or question, just leave a comment, or come join our Discord community.