The long-anticipated Phase 2 of the Teenage Mutant Ninja Turtles (TMNT) crossover event is now live in Capybara Go, and it’s shaping up to be one of the most important events the game has seen so far. Whether you’re a veteran chasing min-maxed mythic adventurers or a newer player hoping to land your first real power unit, this event delivers in a big way.
Let’s break everything down so you don’t miss out on the rewards, resources, or mythic units you can earn during this limited-time collaboration.
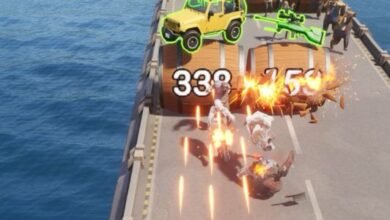
Capybara Go Ninja Turtles Phase 2 Guide – Rewards, EXCHANGE
If you’re new to the game, this event is your best shot yet at getting your first mythic adventurer. And if you’ve been playing for a while, this is a rare chance to collect valuable stat-boosting adventurers like Donatello and Michelangelo that might not return later. These units not only add to your collection — they passively boost your entire team’s performance just by being owned at one-star.
So, whether you’re aiming to unlock or upgrade a Ninja Turtle, or farm out resources for future content, this event should be your top priority.
Basic Daily Activities You Shouldn’t Ignore
Let’s start with the daily grind tasks that you should be doing no matter what. The Foot Clan’s Revenge is essentially a guild boss. It’s straightforward: just deal as much damage as you can daily. There’s a leaderboard, and the top-ranking players can earn things like inheritance books, but even if you’re not competing for top spots, you still want to participate daily for the gems and progression materials.
Then there’s the daily sign-in bonus, which is exactly what it sounds like — log in every day and collect free rewards. No reason not to grab these.
You’ll also see a task system called Street Mobilization, which tracks your in-game activity and rewards you for spending tokens. You’ll be doing these tasks naturally as you play — like opening chests, summoning gear, or interacting with eggs — and while doing so, you’ll earn more tokens, which feed into the event’s central feature: the Gacha Raid.
The Gacha Raid – How You Get TMNT Adventurers
At the heart of this event is the TMNT-themed gacha system, where you spin using event tokens to collect rewards — including the shards needed to unlock Michelangelo and Donatello.
Here’s how it works: every spin contributes to your Luck Meter, and as that meter fills up, you get closer to entering Lucky Mode. Once you hit Lucky Mode, you’re eligible to earn Donatello Shards (5% chance) and Michelangelo Shards (15% chance).
The catch is that you need 60 shards to fully unlock either adventurer, so unless you’re lucky, expect to spin quite a bit. You can increase your luck gain by sending event gifts to friends — which you’ll earn while spinning — so make sure to use them often to trigger more lucky spins.
How to Get More Tokens for Gacha Spins
Tokens can be earned in two main ways. First, through event tasks, which are tied to regular gameplay — opening eggs, drawing equipment, making purchases, etc. You’ll see a task list under the “Raid Token” section in the event menu.
Second, if you’re really pushing for a one-star TMNT adventurer, you can buy extra tokens directly using gems. The event lets you spend up to 100,000 gems, so if you’ve been saving, now’s the time. This event is absolutely worth using saved gems on, especially because the Ninja Turtle adventurers may not return.
The Reward Shop – What Should You Spend On?
Once you’ve done your spins and gathered enough Heavy Punch Badges, you’ll want to visit the Reward Shop. This is where you can redeem your badges for event rewards — including TMNT adventurer shards, gear, mounts, and resources.
Here’s what’s important to know: unlike in Phase 1, you can no longer buy a full adventurer outright at a discount. Instead, every shard costs 40 Heavy Punch Badges, and with 60 shards needed per adventurer, that means you’ll need 2,400 badges to unlock just one.
So, if you’re tight on badges, prioritize getting at least one copy of Donatello and Michelangelo. They’re not just strong — owning them at one star grants passive stat boosts to all your other adventurers. If you only have enough for one, Michelangelo is the easier one to acquire, since his shard drop rate is higher in the Gacha (15% vs. Donatello’s 5%).
The shop also includes a unique mount called Flyer No. 1, which gives global HP and movement speed buffs. It’s a nice bonus, but not nearly as important as the TMNT adventurers. Skip all the fluff like collectibles, awakening cores, and minor upgrade materials. Focus your badges on adventurers.
Resonance System – Why One Star Matters
Even if you don’t plan to use Donatello or Michelangelo actively, unlocking them still matters. Thanks to the Resonance System, you can transfer star levels from one adventurer to another.
So, let’s say you’ve upgraded Dragon Girl to one star. If you later pull a TMNT adventurer, you can transfer that one-star level to them — or vice versa. This system makes every adventurer you unlock more valuable long-term, even if they’re not your current main unit.
That’s why it’s smart to aim for at least one copy of each TMNT unit, especially during events like this, where the odds and costs are more favorable.
Which One Should You Get – Donatello or Michelangelo?
At this stage, we don’t have full data on which unit is better for every build. Based on early testing:
- Donatello appears to focus more on skill-based damage.
- Michelangelo might lean toward counterattacks and basic attack-based damage.
If you’re unsure, go for Michelangelo first. He’s easier to unlock and still offers valuable team-wide stat upgrades at one star. Donatello will be harder to farm due to his lower drop rate, so prioritize accordingly.
Normal Shop Recommendations (Red Jacket Shop)
Aside from the event store, there’s also the normal red jacket exchange shop, which has standard progression items.
Here’s what’s most worth picking up:
- Legendary Keys – always useful.
- Wishing Scrolls – consistent upgrade tools.
- Elite Packs – great value for progression.
- Gem Keys – these are new but offer strong potential value.
- Heavy Punch Badges – worth buying if you’re close to unlocking a 1-star adventurer.
Skip random insignias or lower-tier materials unless you have excess currency. Focus on guaranteed progression.
Final Strategy & Gem Usage Advice
If you’ve saved up gems, this is the event to spend them. Focus on:
- Reaching Lucky Mode multiple times via Gacha spins.
- Unlocking at least one TMNT adventurer (Michelangelo first).
- Saving enough badges for Phase 3, which will likely bring all 4 TMNT heroes back.
If you’re a newer player and don’t think you’ll get enough tokens for Dragon Girl or the TMNT units, just focus on unlocking Michelangelo — he’s easier to get and still gives a team-wide stat buff at one star.
For veterans, this is your time to push for multiple one-star adventurers. Use the resonance system later to align them with your current build.
This event is more than just a flashy collab — it’s one of the best opportunities to grab permanent power-ups for your account. Even if you don’t max out your rewards now, just unlocking the TMNT adventurers at one star can benefit your entire lineup.
Remember: collaboration events might not come back. If you miss these units, they could be gone for good — or return behind a bigger pay/resource wall. So make the most of Phase 2 now, and prepare for Phase 3 with smart saving and spending.