
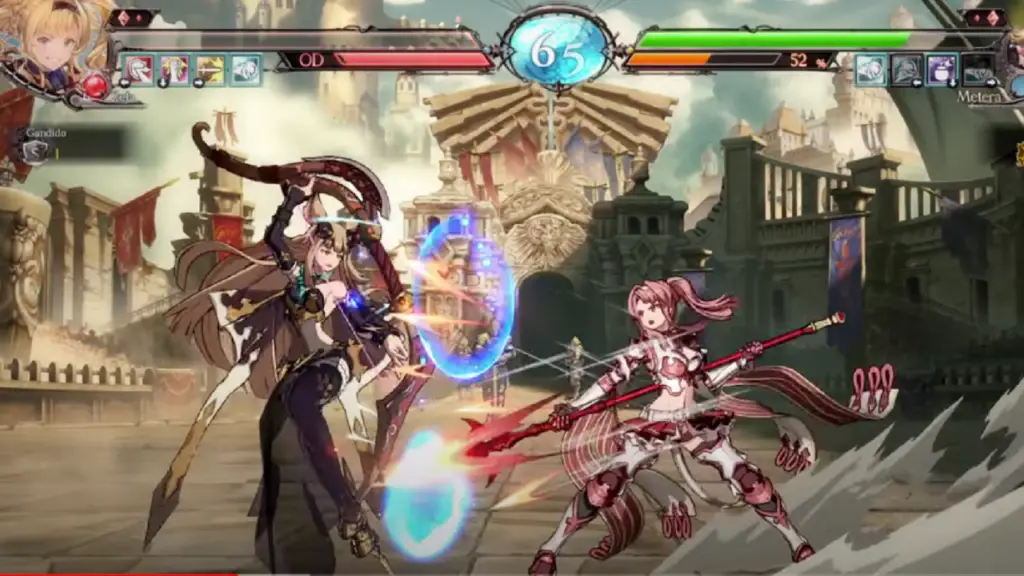
Zeta is a character focused on space control in Granblue Fantasy Versus Rising. She is a corner-pressure character who is surprisingly flexible thanks to her unique tools. She lacks the reliable defensive and neutral options that most of the cast possesses and makes a lot of matchups an uphill battle.
This shouldn’t discourage you though. Zeta also has some of the best pressure and mix-up options during Oki thanks to her ability to get hard knockdowns and start her safe jump loops.
But there’s a catch, to make full use of these setups she needs a hard knockdown especially one in the corner so that’s going to be your main objective.
Fortunately, Zeta gets a good corner to carry from most confirms and has the tools to get around most situations.
Zeta Guide: Strategy and Noteworthy Normals
-cl.L/2L
Both of them are + on the block. Because of this they can easily start your pressure and can be applied to go for pressure resets, frame traps and tick throws. For the most part, you’ll be using 2L for not being a proximity normal and having good range, meanwhile, cl.L is worth mentioning for being easily hit confirmable with the auto combo.
-f.L
A fast button with decent range, it hits crouching opponents very consistently despite how it looks and it’s your easiest and safest punishing button thanks to the range and speed.
-f.M/2M
These are your main poking tools in neutral. 2M is the most important for being faster than f.M and it can catch rolls but f.M has the better range. Your main objective with these buttons is to keep the opponent in check at a mid-screen distance or after a 5U/ spaced 236X and confirm it into 66H or Tactical Rush for corner carry or full conversions in the corner.
-f.H
It is surprisingly good with a faster start-up than f.M, a little bit less range and more active frames. Useful for whiff punishes as it allows for bigger damage and can be used in neutral like the M normals.
-2H
Once the worst anti-air in the game and now one of the best thanks to the buffs it got. The hurtbox doesn’t extend before the hitbox anymore, the range is pretty good, can hit behind her and leads to great damage on counter hits, just be careful with the slow startup and recovery.
-5U
Spear stabs that push the opponent back, -2 on block and +2 on hit so it’s a very good option to end your blocktring safely and build distance to use your pokes effectively but your opponent can easily instant block it so be careful with giving them free meter.
-2U
Two hit sweep, not very good by itself for being too slow and the first hit has poor range. But it’s very important for the safe jump loops that are a vital part of Zeta’s gameplan so it’s your go-to ender in corner routes when not going for damage.
-j.H
Your jump is normal, being pretty fast and having a good forward hitbox. Can easily convert into a combo and sees use as a combo filler in corner routes and pogo mix-ups so it’s very versatile.
-j.U
Good old Pogo and the reason most people will hate to play against this character. Allows for many mix-ups after a safe jump and can be cancelled into itself 2 times.
A core part of Zeta’s mix-ups and pressure in the corner can be abused by conditioning the opponent to respect you thanks to all the options it opens for your pressure. It’s also very safe as with good timing all the pogos become dp safe so your opponents is discouraged from challenging you.
-Infinite Wonders (236X)
A fullscreen beam (it doesn’t beat other projectiles anymore), slow and very linear so be careful with it because the opponent can jump/roll and punish you thanks to the long recovery.
The M version can be charged but it’s even slower than the L version. You can use it to bait your opponent who is likely expecting the L version H version does 2 hits and it’s very important for the corner extensions as the second hit wall bounces (You need the first hit to connect for the second to combo).
This move is not meant to be used for zoning as you’ll lose to most other projectiles that can be thrown at a faster pace and the slow start-up and recovery leave you very open.
You want to use this as a way to let the opponent know that they can’t stay away from you since you have a way to punish them from anywhere on the screen so if they try to get close they will have to play around the beam and you can start mixing up the L and M version, punish their roll or anti-air them.
-Spear of Arvess (66X)
Zeta’s beast cannon. The M version moves further than the L version and both of them can be cancelled into a follow-up by pressing a direction and a button. H version can do the follow-up twice.
Spear of Arvess is a very versatile special that can be used for combo extensions even in midscreen (They can be very finicky though). It’s also an ender for corner carry and a hard knockdown that can allow you to start doing your pogo pressure.
-Spear of Arvess Rise (22X)
Upward version of Spear of Arvess. L version rises diagonally, the M version rises vertically and both can be cancelled into a follow-up by pressing a direction and a button. The H version can do the follow-up twice and has the same angle as the L version.
Rise is mostly used during corner combos and for an easy follow-up after a 2H anti-air. You won’t see this one as much because of how unsafe it is even with the follow-ups.
-Spear of Arvess Fall (j.22X)
Downward version of Spear of Arvess. L version falls diagonally, the M version falls vertically and both can be cancelled into a follow-up by pressing a direction and a button. The H version can do the follow-up twice and has the same angle as the L version.
Shares cooldown with 22X and it’s even more unsafe, can be used to convert random air-to-air hits into a hard knockdown or to bait anti-airs but you’ll rarely see it used in combos or neutral since 22X is a better combo tool.
-Rhapsody (214X)
Stance with armour that can be cancelled into 3 different follow-ups even if it doesn’t block anything. The L version blocks highs and mids, the M version blocks only lows and the H version blocks all moves that aren’t thrown from frame 1 so it’s your main reversal and also enhances all follow-ups done after it. M and H are your go-to options as the L version is only a very risky call-out.
Sadly the move isn’t very reliable when being pressured as you can get hit out of the follow ups but they can see use in neutral to punish moves that are usually hard to get around like Gran’s boot or Katalina’s forward thrust.
Crimson Cleave (214X~L)
Cleave attack with a good horizontal range that can keep the opponent at a safe distance but it’s mainly used for the enhanced version after 214H because it wall bounces and has the best horizontal range from all the follow-ups.
Rising Split (214X~M)
Vertical slash is useful as an anti-air because it has better vertical range than 2H and the armour in 214X can defend you from an aerial approach but you have to commit to it even more than when using 2H. Can be followed up with a combo on counter hit.
Knee Assault (214X~H)
The fastest of the follow-ups so it’s commonly used after a reversal attempt with 214H (You are still vulnerable during the beginning of the follow-ups even if you block a move with 214H).
Zeta can do any air action after it so it’s also the most common follow-up in combo extensions when close to the corner or even as a gimmicky option to reset pressure or mix up the opponent.
-Resolute Strike (236236H or j.236236H)
The ground version moves horizontally and the air version goes down at an angle. A very fast super that can be confirmed from almost any move and a combo ender when going for damage and can even be used as a reversal. Works in most routes since it can be done in the air too but damage scales a lot.
-Sirius Roar (236236U)
Rising attack that will go into a full animation if it hits at close range. Used for max damage combos but you have to be at 30% health before being able to do it, less range than Resolute Strike so not all combos will allow you to go into it.
Basic Neutral Plan
As mentioned before, your main objective in neutral is to get the opponent to the corner, simple enough right?
You can do this in a couple of ways thanks to Zeta’s tools but the most common is by pressuring the opponent with moves like f.M, 2M, f.H and 5U that push them back and put Zeta in a good position with her big normals and if you manage to get a hit then you can go for 66H or 214H~H for a lot of corner carry.
Your buttons have good range so you generally will be poking at the opponent and trying to get in while also using tools like 214X~L/H and 236X to make the opponent scared of challenging you with their buttons or carelessly approaching you.
The addition of Tactical Rush makes your pokes even more scary for the opponent as they can allow you to convert any random hit into a hard knockdown and start your oki which will make them respect you more in neutral.
You can also try to jump in thanks to j.22X which can beat most anti-airs so you can condition the opponent to be scared of anti-airing your reaction and that will open even more opportunities to start your pressure, remember to mix up your approach with high jumps or not jumping at all.
You can also force the opponent to play carelessly by zoning with 236X, so they have to play around it by jumping or rolling and then capitalize from this by anti-airing with 2H or baiting rolls with 2L/2M.
Remember that beam doesn’t cancel projectiles anymore and will trade with them so don’t try to use it for zoning, the main purpose it has is to keep the opponent in check and make them scared that you have a way to punish them from fullscreen so they have to come to you.
These situations will give you easy conversions that lead to even more corner carry if their movement around 236X becomes too predictable.
Zeta Combos Guide
No matter who it is you are playing against, this is what you usually need to know.
All-Purpose Combo Routes:
- 2L2L 2L5L->66H6H6H (2210) – this is now consistent on all standing characters.
- 2L2L5L->66H6H6H (2090) – due to how chains work, all three of these hits will always chain into each other and this will work on crouchers now as long as the initial hits are point blank
- 2L, c5MMM->66H9H9H (2615) – your general confirm off 2L if you are close enough. You HAVE to microwalk normal jump to get pogo oki.
- 2L2L 2U->66L_H6L_H6LH – this is your higher damaging crouch-only combo.
- XXX->66H9H~3H(late, will hit) – this is the only combo that lets you walk up, normal jump, land AND have frame advantage.
- 2L2L 5L/2L -> SBA
- 2L2L 2L -> SSBA (technical input)
- Any button/s into RUSH (6H+M with 50% meter) 66H6H6H or 214HL- works midscreen
Crouching-Only Combo Routes:
- 2L/cL 2L 2U
- 2L2L 2L->66H6H6H
- CH 2L 2M/fH->66H6H6H
- CH 2L c5H/f5H -> 66H6H6H
- CH 2M (close), 2L, 2U
- cL/2L cMMM 214LH/214MH jH 22H6H3H
Anti Air Combo Routes:
- 2H->22H9H9H – this is going to be what you use the most if you are anti airing from 2H
- 2H->22H9H3H, f5L->66H6H6H (3450) – this seems much more consistent now as a general anti-air.
- 2H->22M3_2M, c5MM_c5HH->22H9H9H (3915/4301) – use this when they are right on top of you. Adjust the buttons and the directions accordingly.
- 2H->22H9H9H, f5L->66H9H2H, 2U – in situations where it pushes towards the corner, this is often quite doable.
- 2H->22H8H3H, 2H->66L 2U/fL/cM->66H series
vs. UOH attempts:
- CH c5L/c5M, f5H -> 66H~6H~6H (2530/2830)
- CH c5L/c5M, f5H -> SBA (3400/3700)
Corner Combo Routes for Cooldown Cycling:
With the changes that happened in 2.40, the j.UM fuzzy guard break can still lead into cooldown cycling, but what you have to be cautious about is which Spear of Arvess you still have active. Ideally, what you want to do is use either 66H or 22H at the end of the combo, and finish them accordingly.
- XX->236H, c5H->22H8H2H, c5H->66H6H8H – this is the season 2 meaty pogo setup that allows fuzzy guard break with j.M or j.H after the initial block with an extremely easy autotime and allows you to keep rhapsody
- XX->236H, c5H->214HH, j.H, c5H->22H8H9H_22J8H8H, 2U – new combo! This is what you will go for if you had to resort to using guard point and want to try and cycle your stocks better. The j.H HAS to be done so it hits relatively early. If the 2U hits as deep as possible, you get perfect pogo oki. If it hits slightly higher, walk up and standard pogo oki (no fuzzy). Knowing when to use either 8H or 9H in the combo requires some practice, but for the most part you will use it to fix the combo if you hit them too high for the 8 followup to allow them to not recover (yes, they can recover from the EX Spear of Arvess up route if you do it wrong).
- XX->236H, 5H->214HL, 5H->22H8H2H, 5H->66H6H8H – this is a legitimate true cooldown cycle, but it requires you do do one of two things to make it work if you hit after the deepest pogo with jM or jH: you need to either DELAY the cancel into 66H when you are doing the next combo (use the active frames from 5H to cancel later), or you can start the combo with jM,5L,5MM, which scales the damage a bit, but it gives you the full cooldown cycling and no timing issues on it.
- XX->236H, 2H->22H8H9H, 5M->66H9H2H, 2U – this is the ONLY true legitimate cooldown cycle that can be used over and over again (courtesy of 2Dmgee), but it takes some practice to implement, as the 66H,9H,2H all have to be timed a particular way in order to get the 2U to hit properly at the end to be able to cause the deepest jU, as with any corner ender that involves 66H in that manner.
Corner Combo Routes after landing 214L/M/H into Knee Strike:
- 214L/M~H, j.H (as soon as possible), c5LL->22M2M, 2U (3015) – this is the only combo you get if you land Knee Strike on normal with with the non-EX versions of the armor. You can swap 22M for 22H8H3H in order to get a c5H into SBA/SSBA if you need to get the kill.
- 214L/M~H, j.H (as soon as possible), c5LL->22M2M, 2L – sets up the meaty Beam or UOH. You can cancel into 236M from 2L to get the meaty version that will result in a wall bounce if you CH and gets you a 2U on hit, you can link the 236L as a meaty which combos into f5L on hit, or you can link UOH after 2L and get a perfect meaty that starts with c5M.
- 214L/M~H, j.H (as soon as possible)->22H9H~2H (all of them hit), c5M->214HL, c5H->66H6H8H – the 9H should be done as soon as possible and the 2H follow-up should be done when you reach the apex of the height trajectory.
- 214L/M~H, j.H (as soon as possible)->22H9H~2H (all of them hit), c5M->214HH, j.H, c5H->SBA/SSBA
- 214LH (CH) or 214HH, j.H (lowest to the ground), c5H->22H8H2H, c5H->66H6H8H (4443) – this is the best damage that sets up the perfect pogo for a fuzzy break that is done with ease, plus it preserves your Beam and EX Air Spear stocks which are important in regards to making sure the cycle can continue
- 214LH (CH) or 214HH, j.H (lowest to the ground), c5H->22H8H2H, c5H->236H, 2U (4538) – gives above average to perfect pogo oki, with more damage, but at the expense of the Beam stock being consumed. Otherwise, a better damage choice.
- 214LH (CH) or 214HH, j.H (lowest to the ground), c5H->236H, c5H->22H8H2H, 2U (4632) – More complicated and damaging route that still uses the beam stock, but allows for cooldown cycling for the Guard Point so you can use the same combo route over and over.
- 214LH (CH) or 214HH, j.H (lowest to the ground), c5H->236H, c5H->22H8H2H, c5H->SBA/SSBA (5547/5994) – best choice for raw damage.
Corner Combo Routes beginning with XX into EX Spear of Arvess (66H)
These are important to learn because a huge part of the wall damage that you can get is going to come from punishing whiffs with either f5H, 2M or 5M into EX Spear of Arvess (SoA), as well as confirming 2L2L5L.
- XX->66H9H2H_66H9H3H, c5M->214HH, j.H, c5H->22H8H(2H_3H), 2U – this is the old combo, which is still very consistent. You will use either 2H or 3H at the end depending on how high the j.H into c5H hits as a means of auto-correcting and not having to time the 2U. You will usually need to do microwalk into normal jump for pogo oki to work.
- XX->66H9H2H_66H9H3H, c5M->214HH, j.H, c5H->22H8H9H_22J8H8H, 2U – using this new combo allows for certain things to happen. On the next combo, if you land a hit after a blocked pogo into 2 hit chain, and you want to keep your armor stock, you can do 2 hit->236H, c5HHH->22M2M, 2U to reset the cooldown cycle in favor of the EX Anti Air SoA. It does not look like it will work, since the cooldown will actually reset AFTER the last hit of c5HHH has landed, but if you mash it long enough, it will come out. You CAN just continue doing the combos with EX Armor into Knee strike, but this is just another route.
- XX->66H9H2H, 2U->236H, 2H->22H8H8H, 2H – this is one of the routes that I was just faced with when playing against 2DMgee’s Zeta, and he uses it to save armor on cooldown, and apparently it cycles, even with the most recent Zeta nerf. It ALWAYS GIVES deepest jU if you jump after, and you can get ambiguous if you go into 214L and knee strike after.. The other issue with this is that it forces you to start combos afterwards with Spear or armor, which implies there will be heavy scaling afterwards OR if you want to use 236H, you have to start the combo with jM,5L5MMM->236H which will let you proceed as before. It’s a good option to have since it works on everyone in the cast. Just make sure that the descending spear hits early enough to use 2U, or swap out for 5LL/5M into the other combo alternatives.
There are other combo routes on the wall that you can use if you want to keep certain cooldowns (namely keeping Guard Point and EX Spear of Arvess on the ground) that still allow you to do perfect pogo mixups, and still do a considerable amount of damage.
- XX->236H, 2H->66L, c5M->22H8H3H, 2U – leads to a perfect pogo, with an additional mixup, as if you go down with 2H instead of 3H, you STILL get the two hit sweep, but your j.U will WHIFF on the way down. NOTE: does not work on Gran, Lancelot, Lowain, Djeeta and Soriz, for some reason (you can still do the 2H into 2U, but 3H into 2U will not work) NOTE 2: this WILL cooldown cycle, but you have to do the full chain after pogo into j.U (5LLL)
- XX->236H, c5H->214LH, j.UUU->j.H->22H6H9H – this combo lets you keep both guard point and EX forward SoA, which comes in handy if you want to gamble on empty jump into armor, or it lets you start a combo if everything gets blocked and you land a whiff punish into 66H.
Corner Combo Routes beginning with XYZ into RUSH (6H+M with 50% SBA Meter)
XYZ -> RUSH -> 236H – is going to be your highest damage starter with rush. Can push up to about 34-35% if you start the combo with 2L2LfL by going into 2H->214HL and cH->22H9H9H. Can go into 2H->66L 2U->66H9H9H series if you only have the cooldown for 66X series available, and you can go into 2H->22H8H2H cH->66H9H9H series if you don’t have Rhapsody available.
That’s all for this Granblue Fantasy Versus Rising Zeta guide primer. For more related reads, check out below:
Granblue Fantasy Versus Rising tier list | Granblue Fantasy Versus Rising Gran Guide | Granblue Fantasy Versus Rising Ferry Guide | Granblue Fantasy Versus Rising Katalina Guide | Granblue Fantasy Versus Rising Lowain Guide | Granblue Fantasy Versus Rising Metera Guide | Granblue Fantasy Versus Rising Lancelot Combos Guide | Granblue Fantasy Versus Rising Cagliostro Guide | Granblue Fantasy Versus Rising Yuel Guide | Granblue Fantasy Versus Rising Beginner’s Guide | Granblue Fantasy Versus Rising Graphics Fix