
SIR FLAMES-A-LOT better known as Percival is one of the most damaging and unique characters in Granblue Fantasy Versus Rising. With his long-ranged pokes, high damage, and outstanding toolkit, he is a threat to be wary of at all ranges in the game.
We are going to talk about his tools in neutral, his strings, combos, RPS playstyle and much more in this Granblue Fantasy Versus Rising Percival guide.
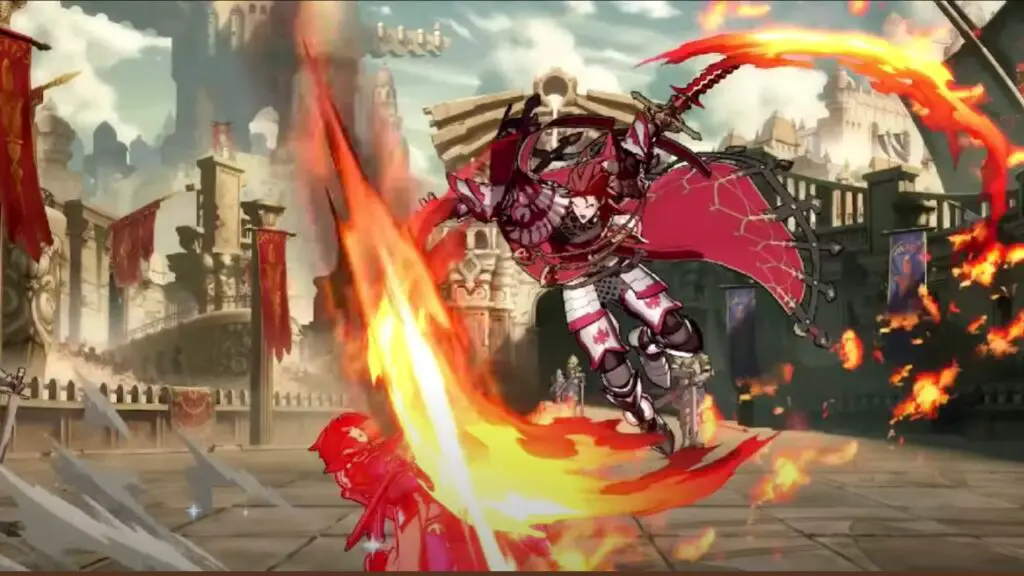
Träumerei
Before we get into anything, let us discuss this one move and the IMPORTANCE of this special move alone. This special move is so important, you’ll see it again when we discuss special moves just to emphasize this point.
This move here is what gives Percival “stocks”. These stocks power up any of his special moves as long as it is NOT the L version of that move which means more damage and in some instances will grant you a knockdown. Understand that as a Percival player, you should ALWAYS be mindful of how many stocks you have.
Percival with ONE STOCK is completely different than Percival with 0 stocks and thus your playstyle will change.
Granblue Fantasy Versus Rising: Percival Guide (Strategy and Normal Overview)
Percival’s normals tend to have a lot of range and by definition have a lot of recovery. Let’s break down each normal and the importance of said normal:
5L: First and foremost, Perci’s 5L is 5F startup and +2 on block. It has an alright range but doesn’t lead to much outside of autocombo.
2L: It is a 6f low that links into itself, which can be cancelled into M DP (Platzen) or 214M-H (Zerreissen) for a knockdown if you sense that your opponent is walking back.
Links into 5L and 2L on standing opponents. Links into 2M and 2U on crouchers.
fL: 6f and links off 5L or 2L but will whiff on crouchers at max range. This tool is mainly used to convert off links into 214(M/H)-H or M DP.
5M: 7F button that is 0 on the block. Can be used after 5L to frame trap as it has a 5f gap. Also can be used as a good anti-air against certain moves like CHARLOTTA EX NOBLE STRATEGY
2M: 7f mids that can be used as a counterpoke but would probably be your second best counterpoke after 5M but it is good considering that on crouchers links.
FM: This button can be considered your main party starter/poke/neutral button. Normal is 9f and is possibly your main button to play neutral with.
5H: THIS IS A 10F normal and BOY IF YOU GET HIT WITH THIS. Assume you’re about to explode cause boy this normal right here HURTS. Does 1200 damage and will have you thinking about what the hell did you to get hit with this normal right here
2H: I’m going to repeat this statement four times to EMPHASIZE the importance of this normal. THIS IS YOUR ANTI-AIR. THIS IS YOUR ANTI-AIR. THIS IS YOUR ANTI-AIR. THIS IS YOUR ANTI-AIR. This normal starts up in 11f and WHEN YOU HIT YOUR OPPONENT FOR JUMPING AT YOU, YOU DO MEDIUM LORD’S STRIKE.
*As of 2.01, doing Medium Lord’s Strike won’t take the stock provided you don’t commit to the follow-up. You may trade off damage by getting fH instead of 5H but it is far more consistent.
The reason you do Light Lords Strike is because NOW we get into Perci’s guessing mechanic
- If it is CH, you kill them for 33-38% depending if you have a stock or not.
- If it didn’t CH, you can use it to create a left-right
- If you think they will use the block button, then you can command grab them
fH: This normal is also 12f startup and is your farthest reaching poke covering 75% of the screen so if you need to whiff punish something for heavy damage, you CAN use this normal. Be careful with this normal because it is VERY EASY to whiff punish.
Due to the recent patch to his command grab, it is now +12 meaning you can always connect this normal. DO NOT THROW THIS NORMAL OUT AND NOT CANCEL IT. Cancel it into Dodge, Light Träumerei, or Fireball to make yourself safe.
5U: They gave him a command grab that allows him a free combo. There is a trade-off as the command grab scales as 2 hits so it doesn’t hurt the opponent too much. but the fact that it exists alone is terrifying and helps his RPS. 14f startup
2U: 7f startup with decent range. Can be special canceled and also set up a safe jump or you could sacrifice that to get a Medium Traumerei.
j.L: This is the button you want to use if you want to AIR TO AIR someone. It can be used as a last-minute safe jump but there’s no reason to use this air normal when j.M is GOAT.
j.M: This will be your primary jump-in for several reasons. The first one being is that it crosses up and leads to a pretty easy follow-up with 2L.
j.H: This is your air-to-air button and your longest-ranged attack. Won’t be using it much outside of air to air-to-air approach.
j.U: Very useful against characters with rather lacking anti-airs as it can bait them out and punish them. Fun fact: THIS IS SPECIAL CANCELABLE ON LANDING. No clue why they did it. But it’s there lol. It even frames traps to 214H-H against 5f.
Rock-Paper-Scissors(RPS)
The second thing you have to understand is Percival’s Rock-Paper-Scissors game. A lot of his interactions can be simplified down to RPS. For that very being you will see me mention the term RPS quite a bit throughout the guide.
This includes oki, neutral and even antiairing can be explained as a sequence of Rock Paper and Scissors. By understanding his RPS game, you can get more damage out of the character and more favourable situations for yourself on the errors of your opponent.
Unique Mechanics
5U: They gave this MF a command grab as a unique. As it wasn’t already terrifying enough to get hit by this guy NORMALLY. They gave him a command grab that allowed him a free combo. It starts at 14F.
There is a trade-off as the command grab scales as 2 hits so it doesn’t hurt the opponent too much. but the fact that it exists alone is terrifying and helps his RPS. Also, the move is +12 so you can always connect 5H after it regardless if it’s close or far. Midscreen you will get far 5H and in the corner, you get close to 5H.
j.U: Very useful against characters with rather lacking anti-airs as it can bait them out and punish them. They just wanted to give you UMvC3 Dante jS.
Pressure
Percival’s pressure could be considered very simple in the use of his fireball. Yet with proper fireball placement, it could be an annoying obstacle course for your opponents to deal with. You could use 5M or 5H into 236L/M.
If your opponent chooses to respect it (again fake pressure), you can run up and use it to continue your pressure. The fun mind game comes when your opponent is expecting a fireball and commits to a hard read for trying to punish your fireball and then dies in the process of making that read.
*Side Note: You can also do this on Ladiva and Vaseraga but why would you want to be close to grapplers? Shouldn’t ideally want to be, if you are trying to play the matchup correctly.
Links
Universally certain moves are plus enough on hit that they can be followed up by another move (outside of auto combo) and still combo.
This is called a “link.” Percival has quite a few of these but here are a few that are particularly handy for Perci:
*Denotes links that only work on crouchers
- 2L > 2L > 5L
- 2L > 2L >2M/2U* (Personally think 2U is better)
- 2L > 5MXX
Counter Hit:
- 5M > 2M
- 5M > 5MXX
- 2M > fL/ 5LXX*
- 5H > 5HXX
Percival Combos Guide
Midscreen:
No Stocks:
- Auto Combo xx DP or Ex Fireball
- You preferably want to use the latter as it’ll create the most distance between you to allow you to gain stocks.
- If you use any of the links above your best bet is to end with EX DP.
1 Stocks:
- Auto Combo xx DP/Zereissen (Lord’s Strike H)
- Typically the former is done for reestablishing spacing and the latter is for damage.
Corner:
No Stocks:
- Use midscreen conversions
1 Stocks:
- Autocombo xx DP
- Autocombo xx Zerreissen (Damage Ender)
- Autocombo xx Ex Fireball x 2U (Safe Jump Setup)
- Sets up a safe jump by doing a dodge after 2U into J. H
- Autocombo xx Ex Fireball > 2H/5H x SBA/SSBA
2 Stocks:
- Autocombo xx Ex Fireball > 2H xx Zereissen/DP
- Note: In some cases, you can 5H before Zerreissen for more damage but that’s range-dependent.
- Zereissen for damage
- DP for oki
- Note: In some cases, you can 5H before Zerreissen for more damage but that’s range-dependent.
- Autocombo xx EX Fireball > 5H xx Ex Schneiden x 2U (Safe Jump)
- Could cancel the 2U into SBA or SSBA if more damage is needed
- Autocombo xx EX Fireball > 2H xx Ex DP > 5L > SBA (Easy Input)
- You sacrifice Oki for damage here
- Best used to close out a game since you’ll only be after Lord’s Strike.
- Autocombo xx EX Fireball > 2H xx Ex DP > 5LL > SBA/SSBA (Tech Input)
- By doing technical input, you get a safe jump from SBA but you do sacrifice roughly 150 damage.
3 Stocks:
- Autocombo xx Ex Fireball > 2H xx Ex Schneiden > 2U xx DP
- While this combo does exist, you theoretically need to NEVER DO THIS.
Anti-Air Conversions:
Disclaimer: Due to a recent buff to Lord’s Strike (214X), it is now better to use 214M after a CH 2H. This is because the dash does not take the stock now but the follow up so doing 214M is free.
Midscreen:
No Stocks:
- 2H CH xx 214M** > 5H xx M DP
- Good old reliable. You can do this stock or no stock.
- You typically want to do 214M because occasionally there’s a range where you’ll do 214L but they’ll fly too far and end up behind you. With 214M they always land in front of you, so you’re trading damage for consistency. Sometimes you may get fH instead of 5H but that’s fine because it’s better than the 5H whiffing completely.
- Good old reliable. You can do this stock or no stock.
- 2H CH xx 214M > 5H xx SBA
- Midscreen, this is the most damaged SBA conversion netting you roughly 5K damage. Even better since you can do technical input and use the boosted frame advantage to get 3 stocks if needed as long as you aren’t too close to the corner.
1 Stocks:
- 2H CH xx 214M > 5H x Zereissen (M Lord’s Strike)
Corner:
No Stocks:
- 2H CH xx 214L > 5H x M DP
1 Stocks:
- 2H CH xx 214L > 5H x Zereissen (M Lord’s Strike)
- 2H CH xx 214L > 5H x Ex Fireball >
- 5H x SBA/SSBA
- 2U (Safe Jump Setup)
2 Stocks:
- 2H CH xx 214L > 5H x Ex Fireball > 2H/5H x
- Zereissen
- M/H DP
3 Stocks:
- 2H CH xx 214L > 5H x Ex Fireball > 5H x Ex Schenieden > 2U x M DP
Command Grab Combos:
Midscreen:
Corner:
Safe Jumps:
2U > Dodge > j.H
Stock Ex DP > whiff 2L > sj.H
TECH SBA > sjH
*if midscreen you only get fM/2U
That’s all for this Granblue Fantasy Versus Rising Lancelot guide primer. For more related reads, check out below:
Granblue Fantasy Versus Rising tier list | Granblue Fantasy Versus Rising Gran Guide | Granblue Fantasy Versus Rising Ferry Guide | Granblue Fantasy Versus Rising Katalina Guide | Granblue Fantasy Versus Rising Lowain Guide | Granblue Fantasy Versus Rising Metera Guide | Granblue Fantasy Versus Rising Lancelot Combos Guide | Granblue Fantasy Versus Rising Cagliostro Guide | Granblue Fantasy Versus Rising Zeta Guide | Granblue Fantasy Versus Rising Yuel Guide | Granblue Fantasy Versus Rising Beginner’s Guide | Granblue Fantasy Versus Rising Graphics Fix